AI/ML Enhancement Project - Discovering, deploying and consuming an ML model
Introduction
In this Scenario, a stakeholder/user such as Eric is seeking to discover an existing machine learning (ML) model that has been developed by other ML practitioners, such as Alice. Eric’s goal is to deploy this ML model on an Exploitation Platform, allowing him to integrate it into his own workflow. In this example, Eric wants to create a water-bodies mask using the “water-bodies” model based on a RandomForest segmentation classifier, previously trained by Alice. More details on the training and inference processes can be found in the dedicated article “Training and Inference on a remote machine”.
Firstly, Eric discovers the “water-bodies” ML model by utilising the STAC search functionalities and narrowing down his search by providing key metadata, such as date and geographic location, as well as ML model-specific properties like model architecture or hyperparameters. Once Eric identifies the service with the ML model that aligns with his project requirements, he interacts with the Platform Operator for deploying it as a processing service on an Exploitation Platform. After deployment, Eric can find the deployed service and execute it with his own input parameters, allowing integration in his own geospatial analysis workflows.
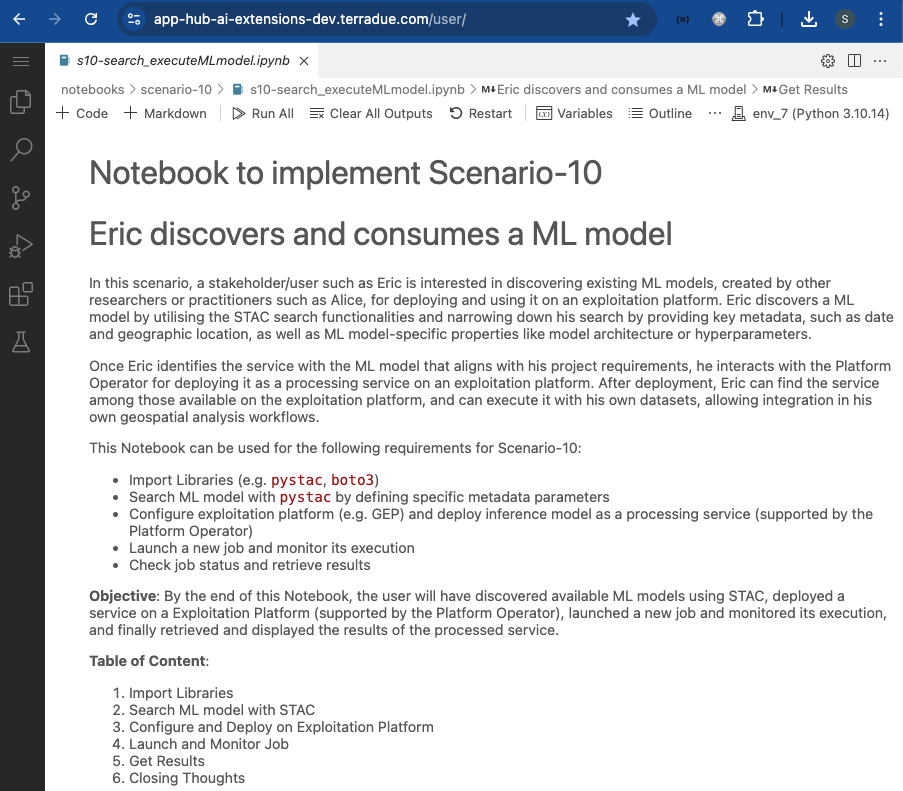
This post presents User Scenario 10 of the AI/ML Enhancement Project, titled “Eric discovers and consumes an ML model”. It demonstrates how the enhancements being deployed in the Geohazards Exploitation Platform (GEP) and Urban Thematic Exploitation Platform (U-TEP) will support stakeholders on discovering ML models using STAC and on interacting with a Platform Operator for deploying an ML model on an Exploitation Platform, after which the stakeholder can execute the service with his/her own data.
These new capabilities are implemented with an interactive Jupyter Notebook to guide a stakeholder, such as Eric, through the following steps:
- Import Libraries (e.g.
pystac,boto3) - Search ML model with
pystacby defining specific metadata parameters - Configure Exploitation Platform (e.g. GEP) and deploy ML model as a processing service (supported by the Platform Operator)
- Launch a new job and monitor its execution
- Check job status and retrieve results
Practical examples and commands are displayed to demonstrate how these new capabilities can be used from a Jupyter Notebook.
Search ML model with STAC
The STAC format and related API can be used not only to discover EO data (as explained in the related article “Discovering Labelled EO Data with STAC”), but also to discover and access ML models that were previously described with the STAC format (see related article “Describing a trained ML model with STAC”). The process, which leverages the use of Pystac libraries pystac and pystac_client, is the same as described in those articles.
In addition to standard key metadata such as date and geographic location, relevant query parameters for finding ML models include model-specific properties like model architecture and hyperparameters. The code below demonstrates how some of these fields are defined in the query dictionary and how these are used to filter results.
# Import Libraries
import pystac
from pystac_client import Client

stac_endpoint = "https://ai-extensions-stac.terradue.com"

# Access to STAC Catalog
cat = Client.open(stac_endpoint, headers=get_headers(), ignore_conformance=True)

# Define collection
collection = ["ML-Models"]

# Define date
start_date = datetime.strptime('20230614', '%Y%m%d')
end_date = datetime.strptime('20230620', '%Y%m%d')
date_time = (start_date, end_date)

# Define bbox
bbox = [-121.857043 ,  37.853934 ,-120.608968  , 38.840424]

query = {
    # `ml-model` properties
    "ml-model:prediction_type": {"eq": 'segmentation'},
    "ml-model:architecture": {"eq": "RandomForestClassifier"},
    "ml-model:training-processor-type": {"eq": "cpu"},

    # `mlm-model` properties
    "mlm:architecture": {"eq": "RandomForestClassifier"},
    "mlm:framework": {"eq": "scikit-learn"},
    "mlm:hyperparameters.random_state": {"gt": 10}
    }

# Query by AOI, TOI and ML-specific params
query_sel = cat.search(
    collections=collection,
    datetime=date_time,
    bbox=bbox,
    query = query
)
items = [item for item in query_sel.item_collection()]
When the query results are retrieved, the basic metadata, as well as the ML-specific properties and hyperparameters, can be fully visualised by inspecting the STAC Item(s).
# Select one item
item = items[0]

# Display properties
print(list(item.properties.keys()))

# Display ML-related properties
[print(p) for p in item.properties if 'ml' in p]

# Display Hyperparameters
display(item.properties['mlm:hyperparameters'])
An example of ML-related properties and hyperparameters of the ML model retrieved from STAC are shown below.
# ML-related properties
mlm:name
mlm:input
mlm:tasks
mlm:output
mlm:compiled
ml-model:type
mlm:framework
mlm:accelerator
mlm:architecture
mlm:hyperparameters
ml-model:training-os
ml-model:architecture
mlm:framework_version
ml-model:prediction_type
ml-model:learning_approach
mlm:accelerator_constrained
ml-model:training-processor-type

# Hyperparameters
{'n_jobs': -1,
 'verbose': 0,
 'bootstrap': True,
 'ccp_alpha': 0.0,
 'criterion': 'gini',
 'oob_score': False,
 'warm_start': True,
 'max_features': 'sqrt',
 'n_estimators': 200,
 'random_state': 19,
 'min_samples_leaf': 1,
 'min_samples_split': 2,
 'min_impurity_decrease': 0.0,
 'min_weight_fraction_leaf': 0.0}
Another key feature of STAC Items are the assets. The expected assets of a STAC Item that describes an ML model are:
model: the asset of the ML model itself (e.g. in.onnxformat)ml-training: the App Package of the training processml-inference: the App Package of the inference process
These can be visualised by inspecting the STAC Item assets:
# Display assets
display(item.assets)

# Printed Output
{'model': <Asset href=https://github.com/ai-extensions/notebooks/raw/main/scenario-7/model/best_model.onnx>,
 'ml-training': <Asset href=https://github.com/ai-extensions/notebooks/releases/download/v1.0.8/water-bodies-app-training.1.0.8.cwl>,
 'ml-inference': <Asset href=https://github.com/ai-extensions/notebooks/releases/download/v1.0.8/water-bodies-app-inference.1.0.8.cwl>}
Once the stakeholder/user Eric has identified the ML model that aligns with his project requirements, he can proceed to access and utilise it for his own purposes. This may involve running the model on his own geospatial data, integrating it into a larger workflow, or applying it within a specific application context.
In this Scenario, Eric wants to create a water-bodies mask using the water-bodies ML model trained by the ML practitioner Alice, therefore he’s interested in the inference service. The URL of the Application Package for the inference service is retrieved from STAC Item assets.
# Fetch URL of App Package CWL of the `inference` service
print(item.assets["ml-inference"].href)

# Printed Output
https://github.com/ai-extensions/notebooks/releases/download/v1.0.8/water-bodies-app-inference.1.0.8.cwl
Configure and Deploy on Exploitation Platform
Once the App Package CWL of the inference service has been retrieved, the user interacts with the Exploitation Platform Operator for deploying it as a processing service with the steps below:
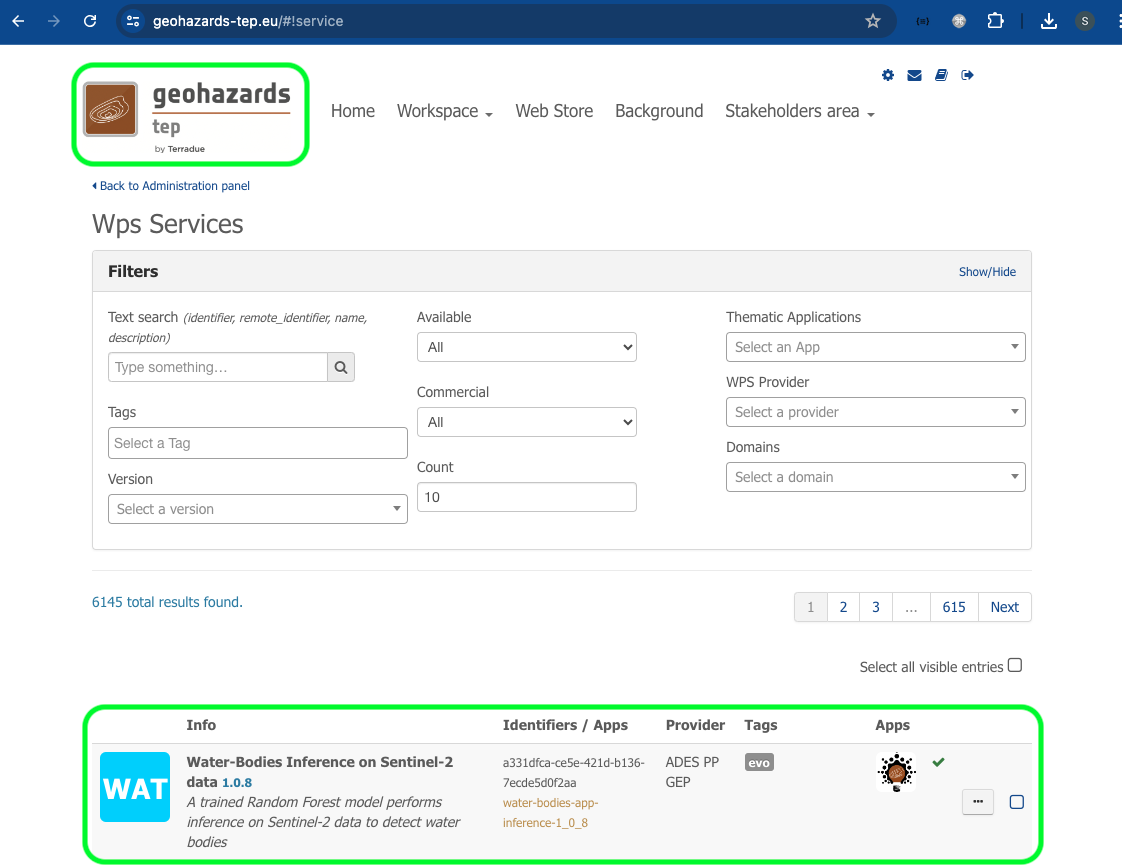
- The Exploitation Platform Operator informs the user about the available Thematic Exploitation Platforms in which the service can be deployed. In this case we are using the
[Geohazard Exploitation Platform (GEP)](https://geohazards-tep.eu/#!). - The Exploitation Platform Operator accesses the GEP Services panel and deploys the Water-Bodies Inference on Sentinel-2 data service by adding a new service linked to the App Package CWL URL provided by the user (i.e. “https://github.com/ai-extensions/notebooks/releases/download/v1.0.8/water-bodies-app-inference.1.0.8.cwl”).
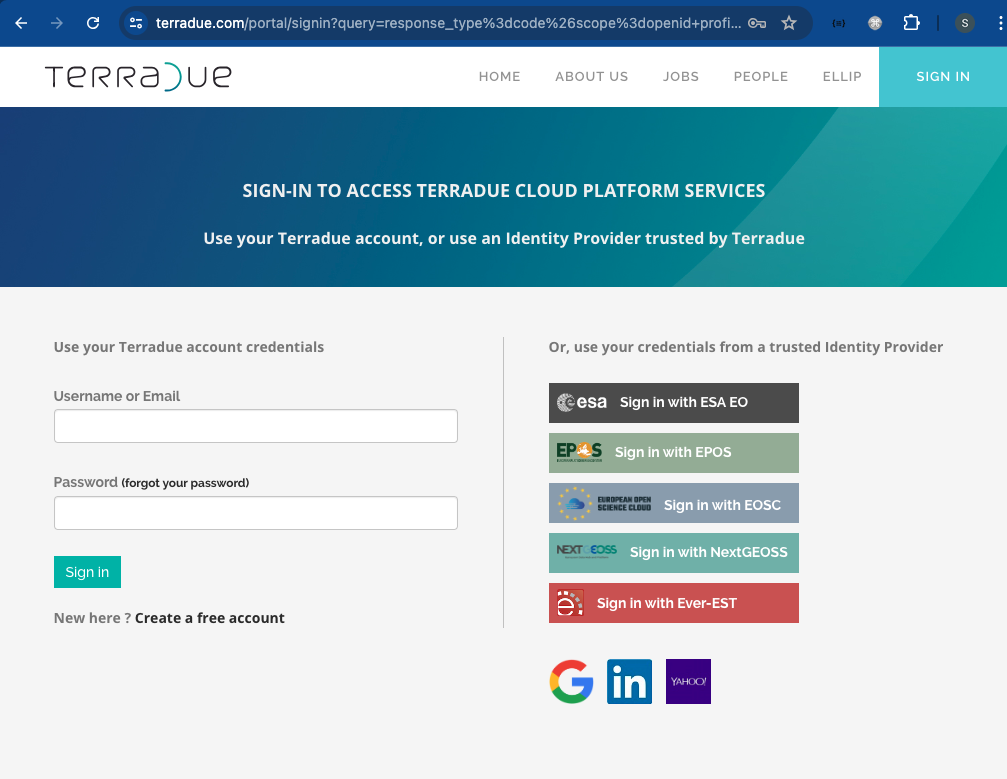
- The user can now login into Terradue sign-in portal:
- The user opens the selected Thematic App (i.e. GEP in this case):
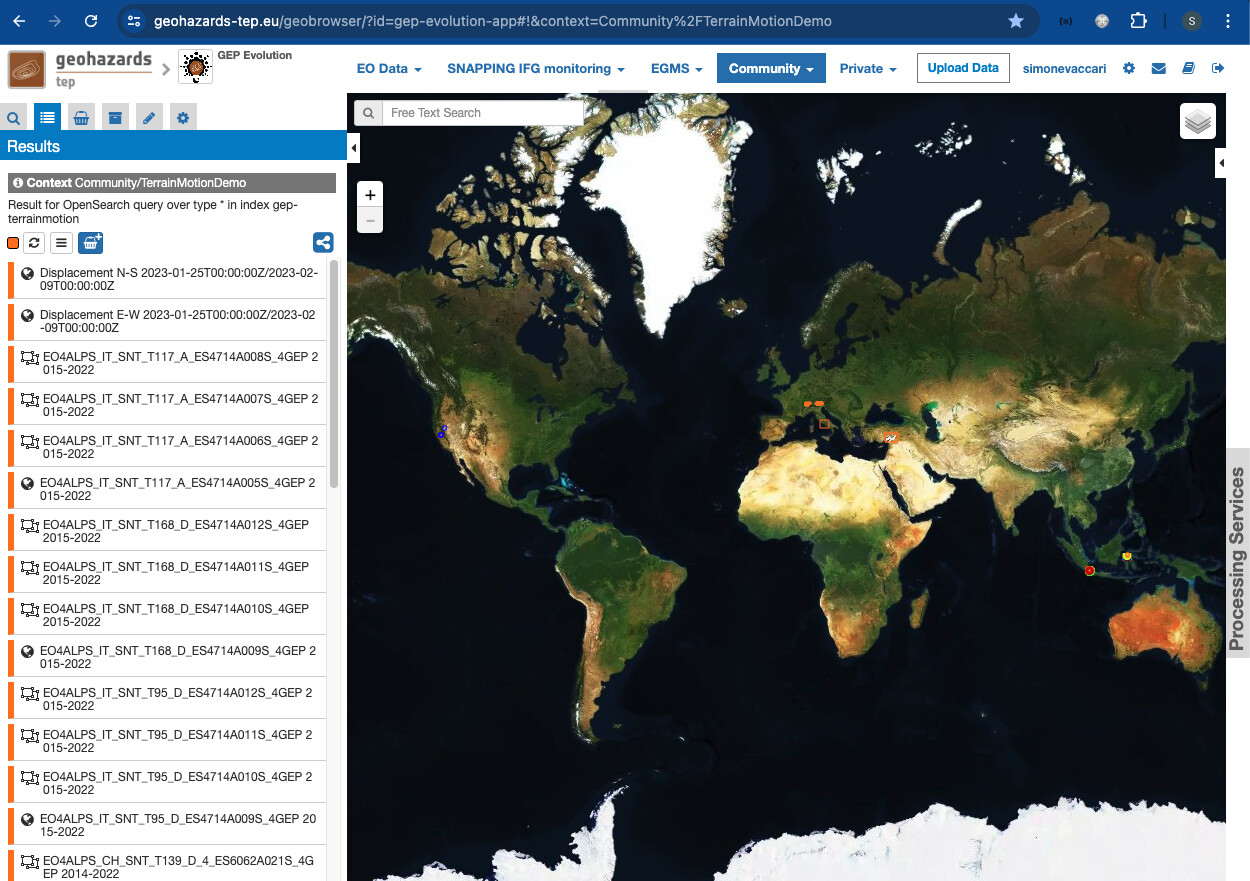
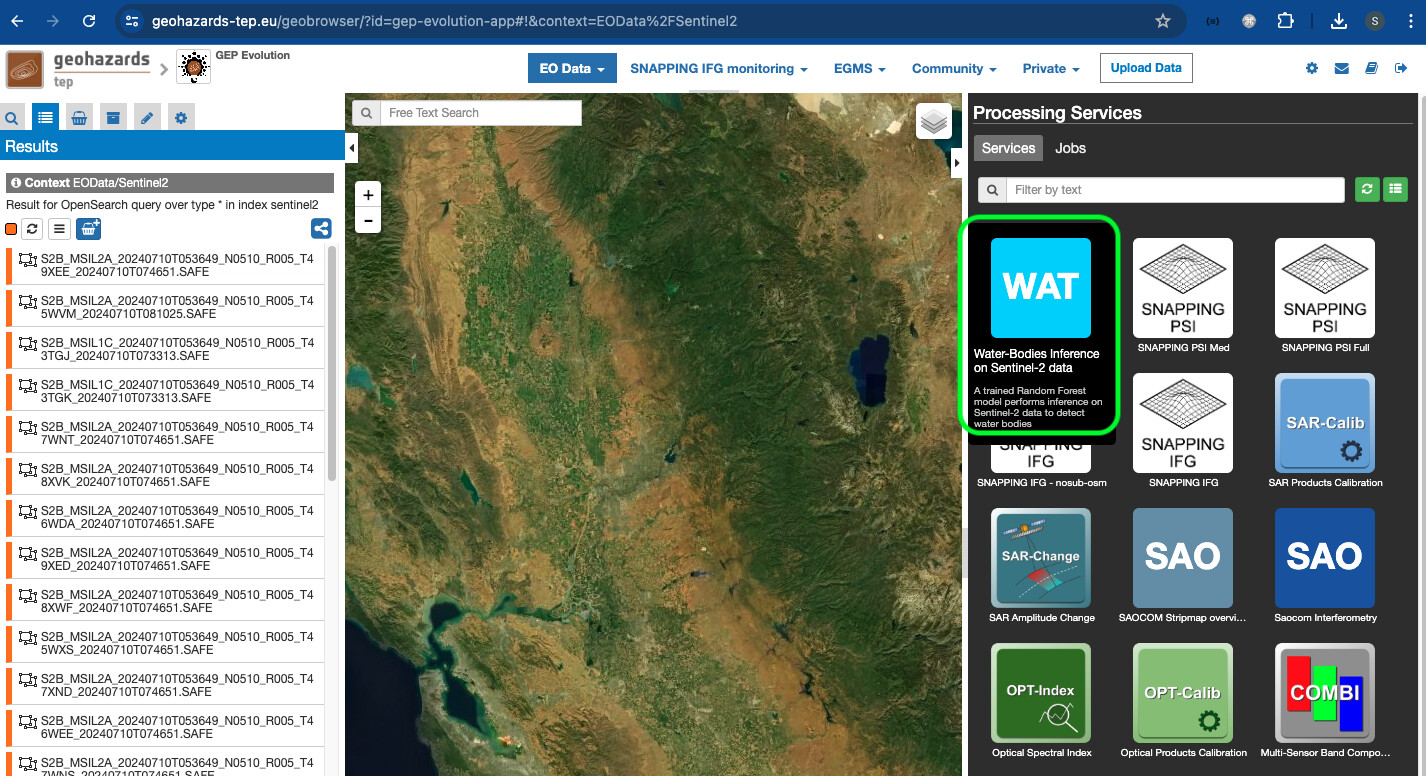
- The user verifies that the
Water-Bodies Inference on Sentinel-2 dataservice has been successfully deployed by checking whether it is listed in theProcessing Servicespanel on the right side of the dashboard:
Launch and Monitor Job
Once the service is successfully deployed, the user can enter the input parameters and launch a new job with the following steps:
- The user opens the
Water-Bodies Inference on Sentinel-2 dataservice panel to check its key properties (e.g. title, version, input parameters).
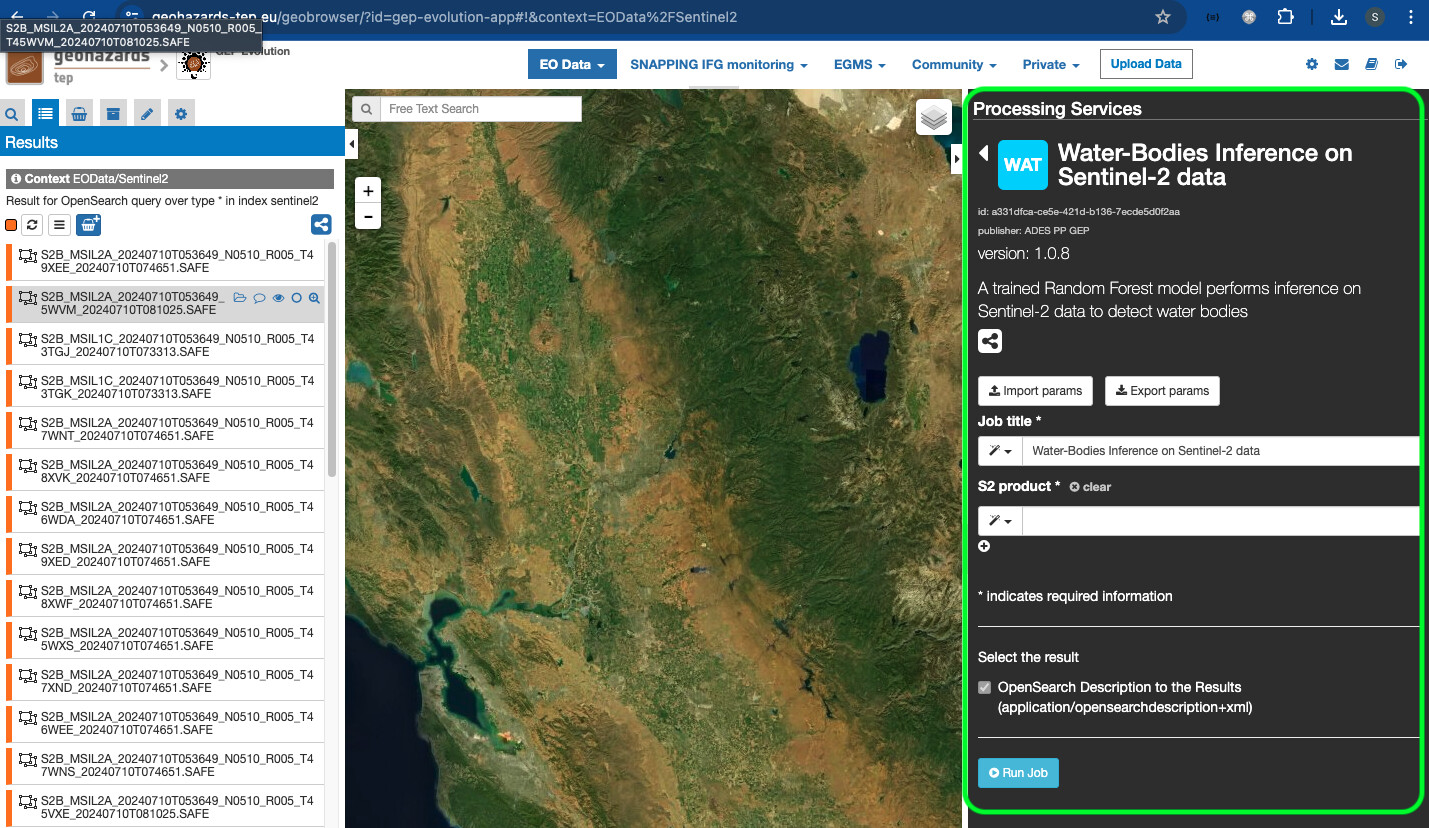
-
The user checks that the required input parameter for the service is a Sentinel-2 product(s) (
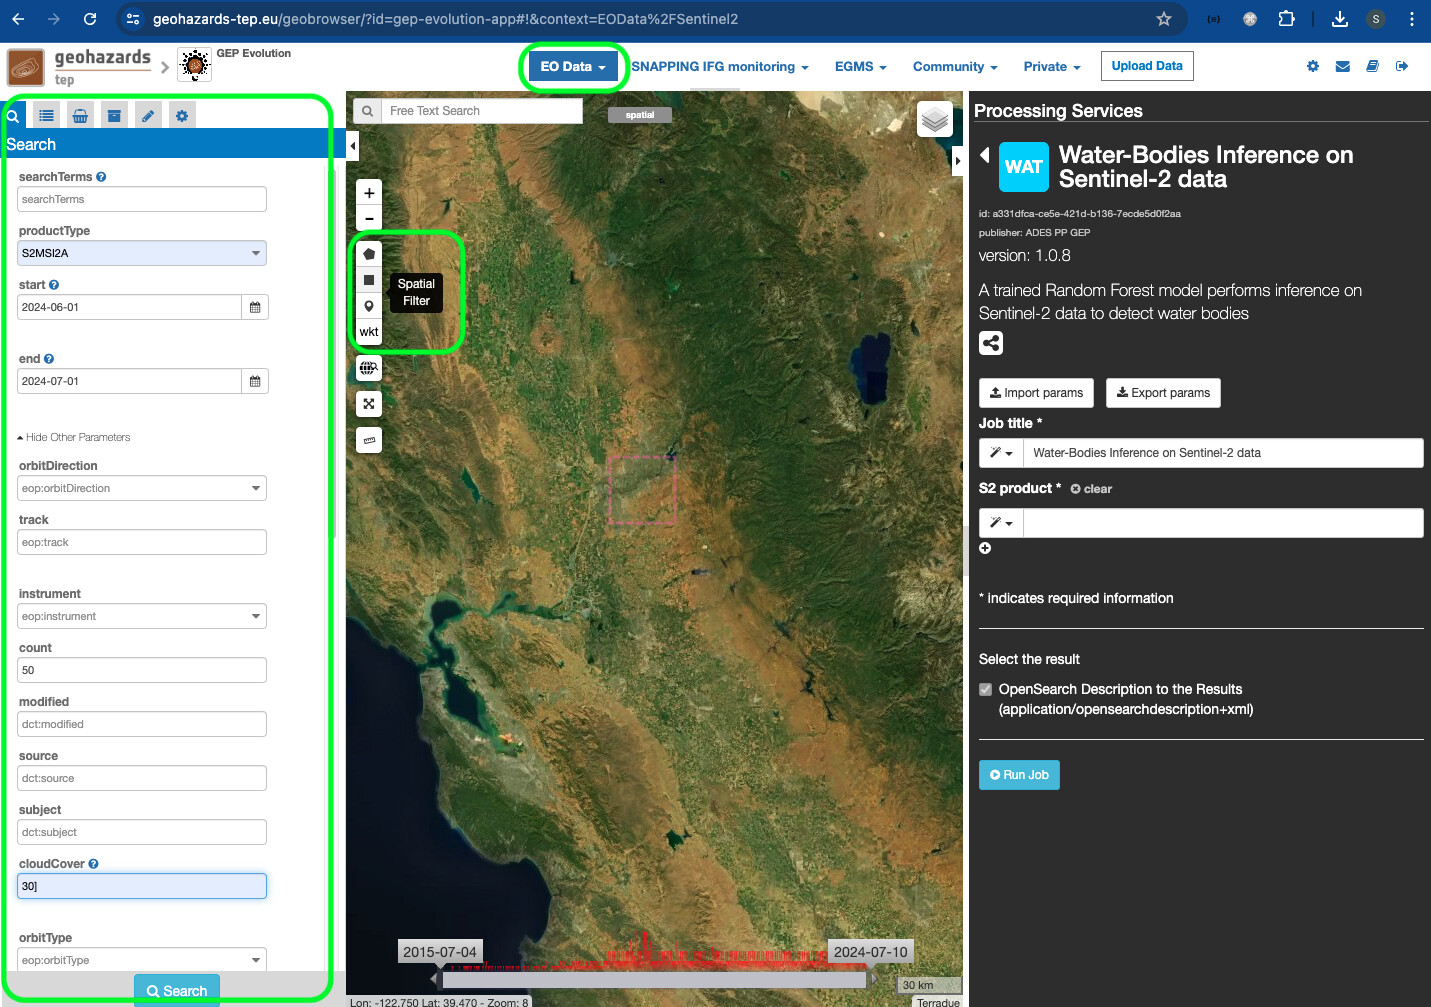
S2 product). The user can search the appropriate data with the following steps: -
click on the
EO Dataicon on the top of the dashboard and selectSentinel 2 -
open the
Searchpanel on the left side, and enters the desired parameters, e.g.:
- product type:
S2MSI2A- Note: this is important as this service works withL2Adata only, notL1Cdata; - start and end date;
- cloud cover;
- spatial filter, by using the dedicated widget on the map.
- when all the search parameters are entered, click on the
Searchbutton.
- After a few seconds, the search will load and display the results on the
Searchpanel. You can double-click on the individual products to inspect its key metadata
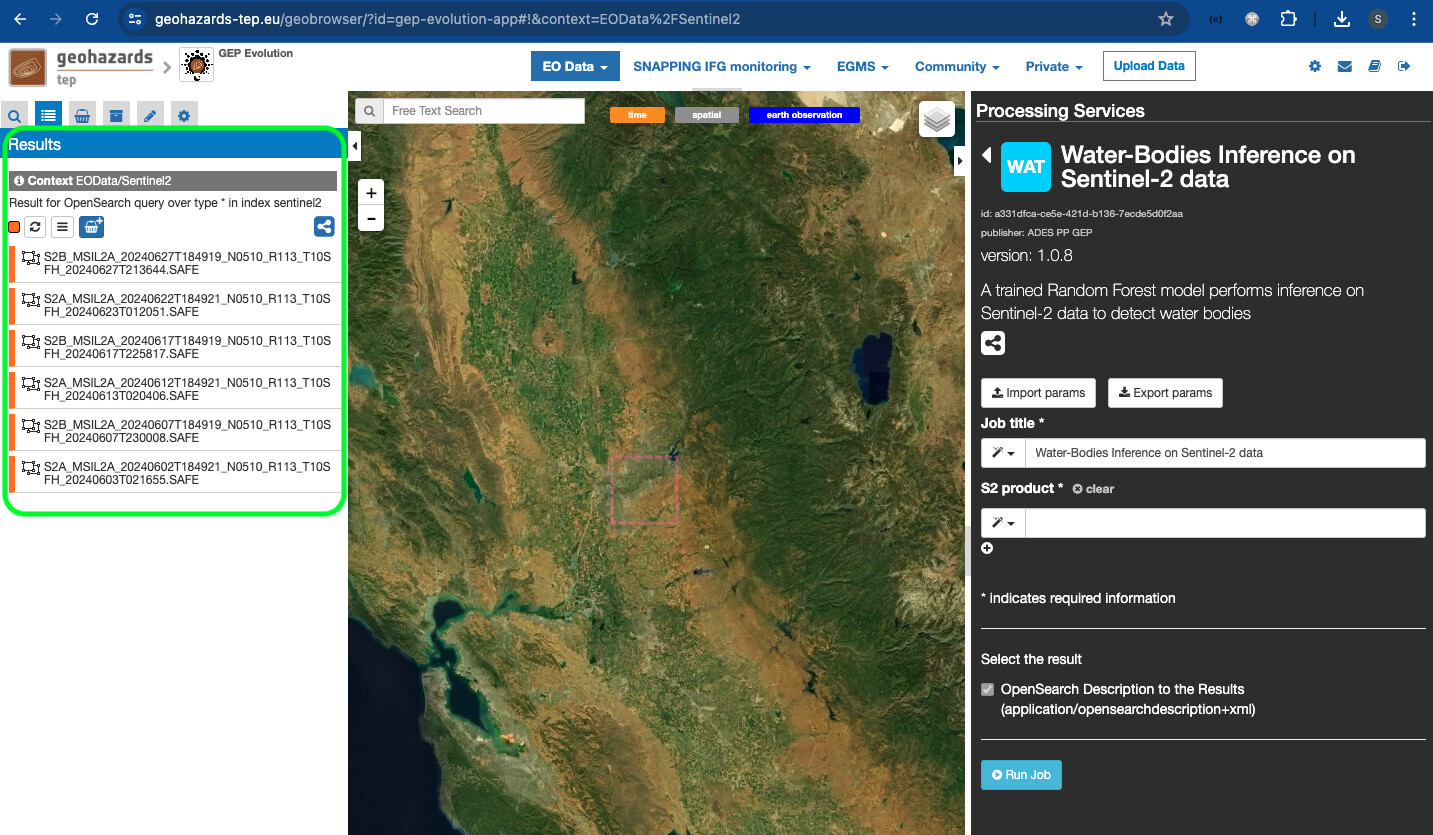
- The user can simply select and then drag and drop each product from the Results panel on the left into the
S2 productfield of theWater-Bodies Inference on Sentinel-2 dataservice panel on the right.
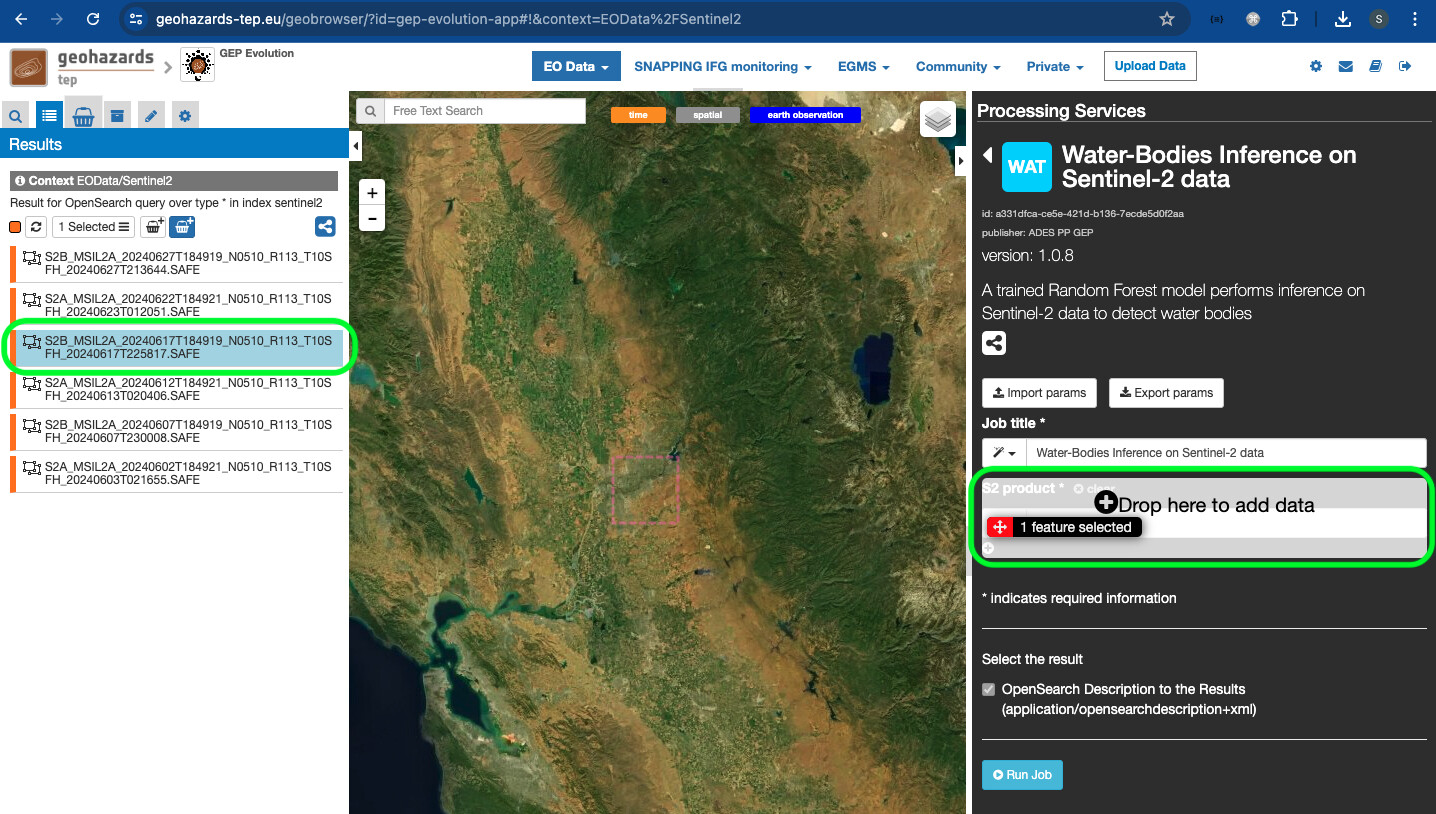
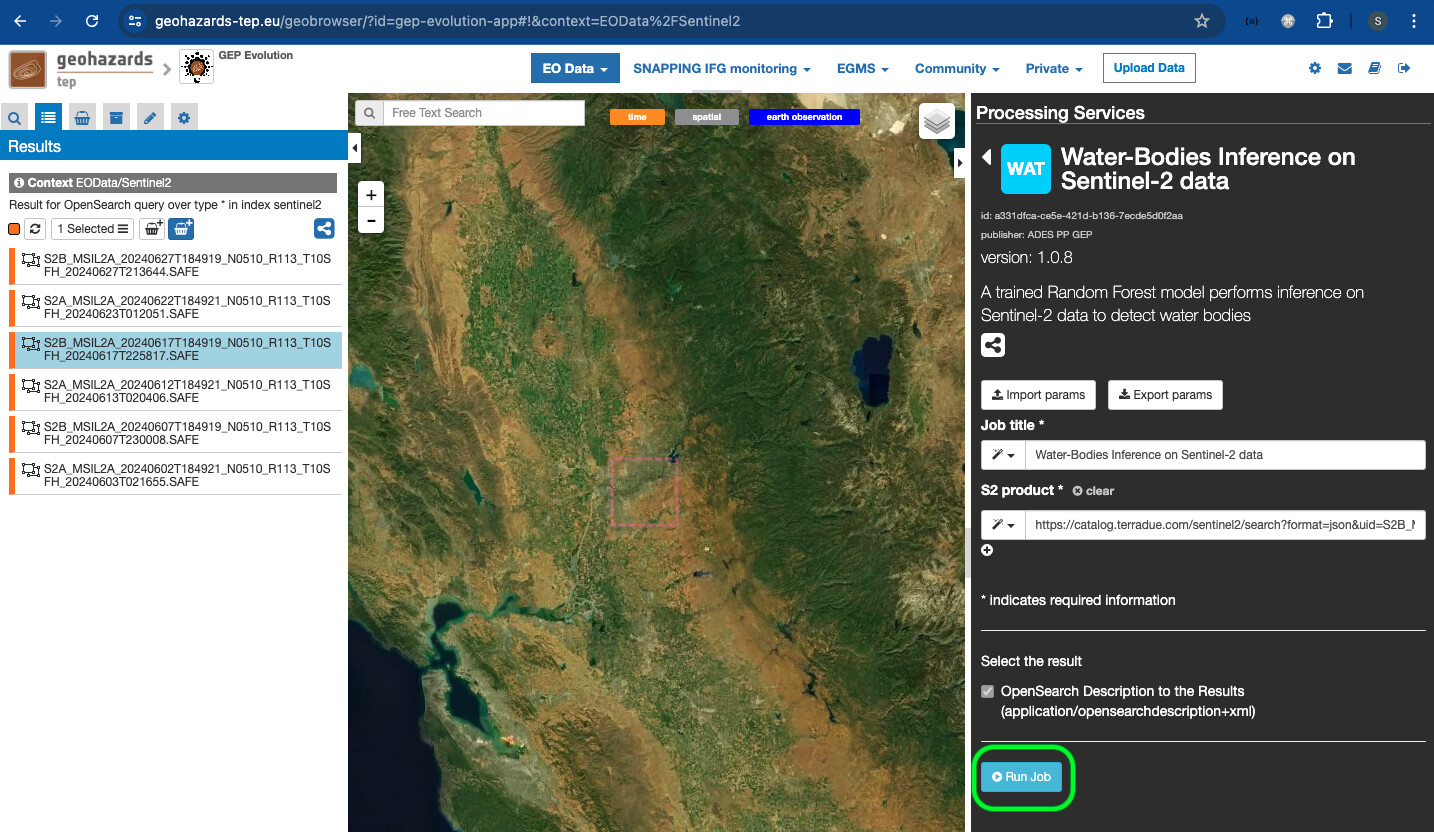
- The user can also edit the title of the job, and when satisfied can click on the
Run jobbutton.
Get Results
Once the job has been created, the user can check its status and then get the produced results with the steps below:
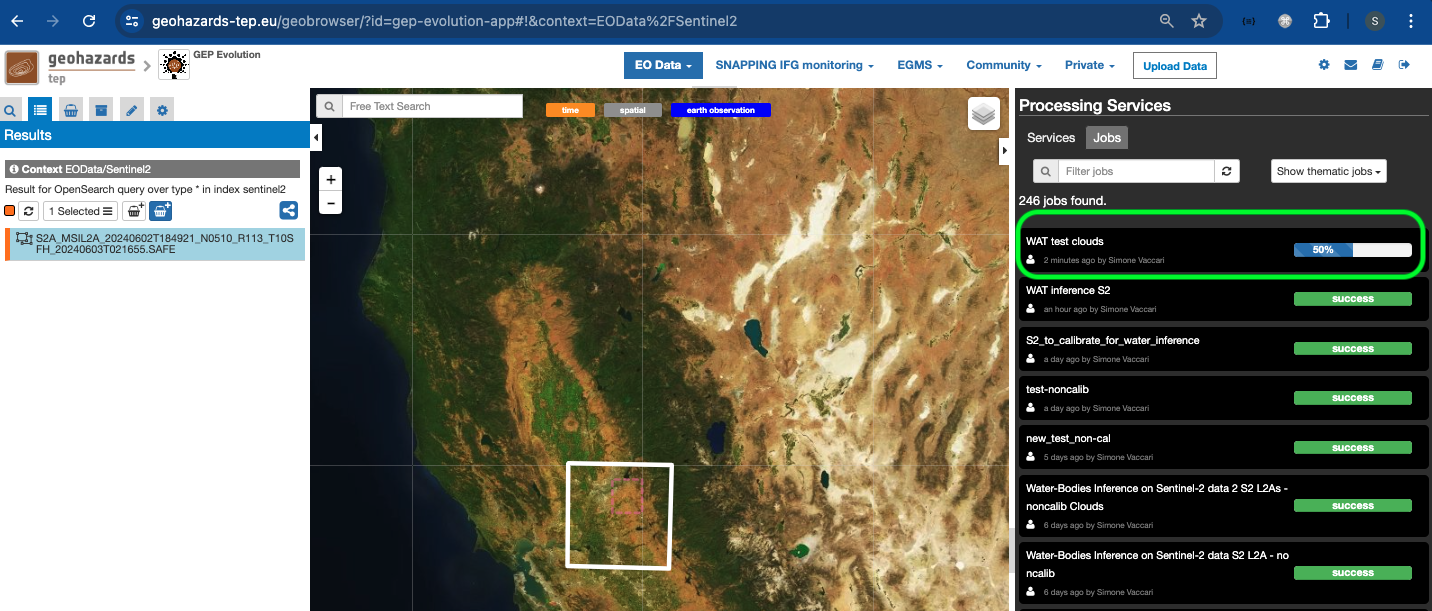
- The user can check the job status in the
Jobssection of theProcessing Servicespanel on the right of the screen.
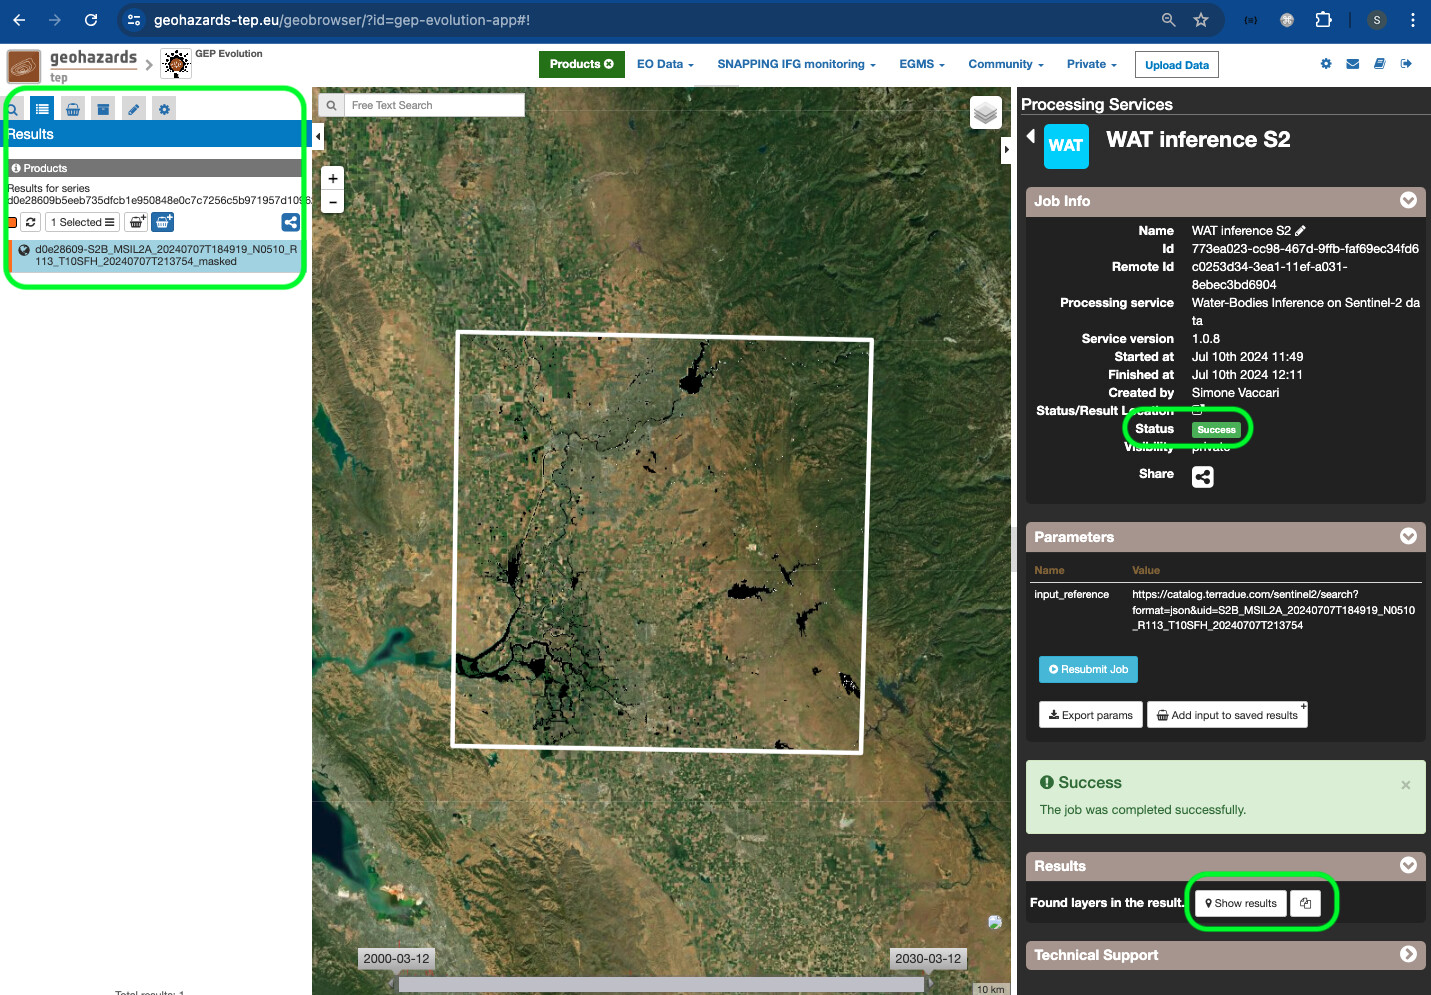
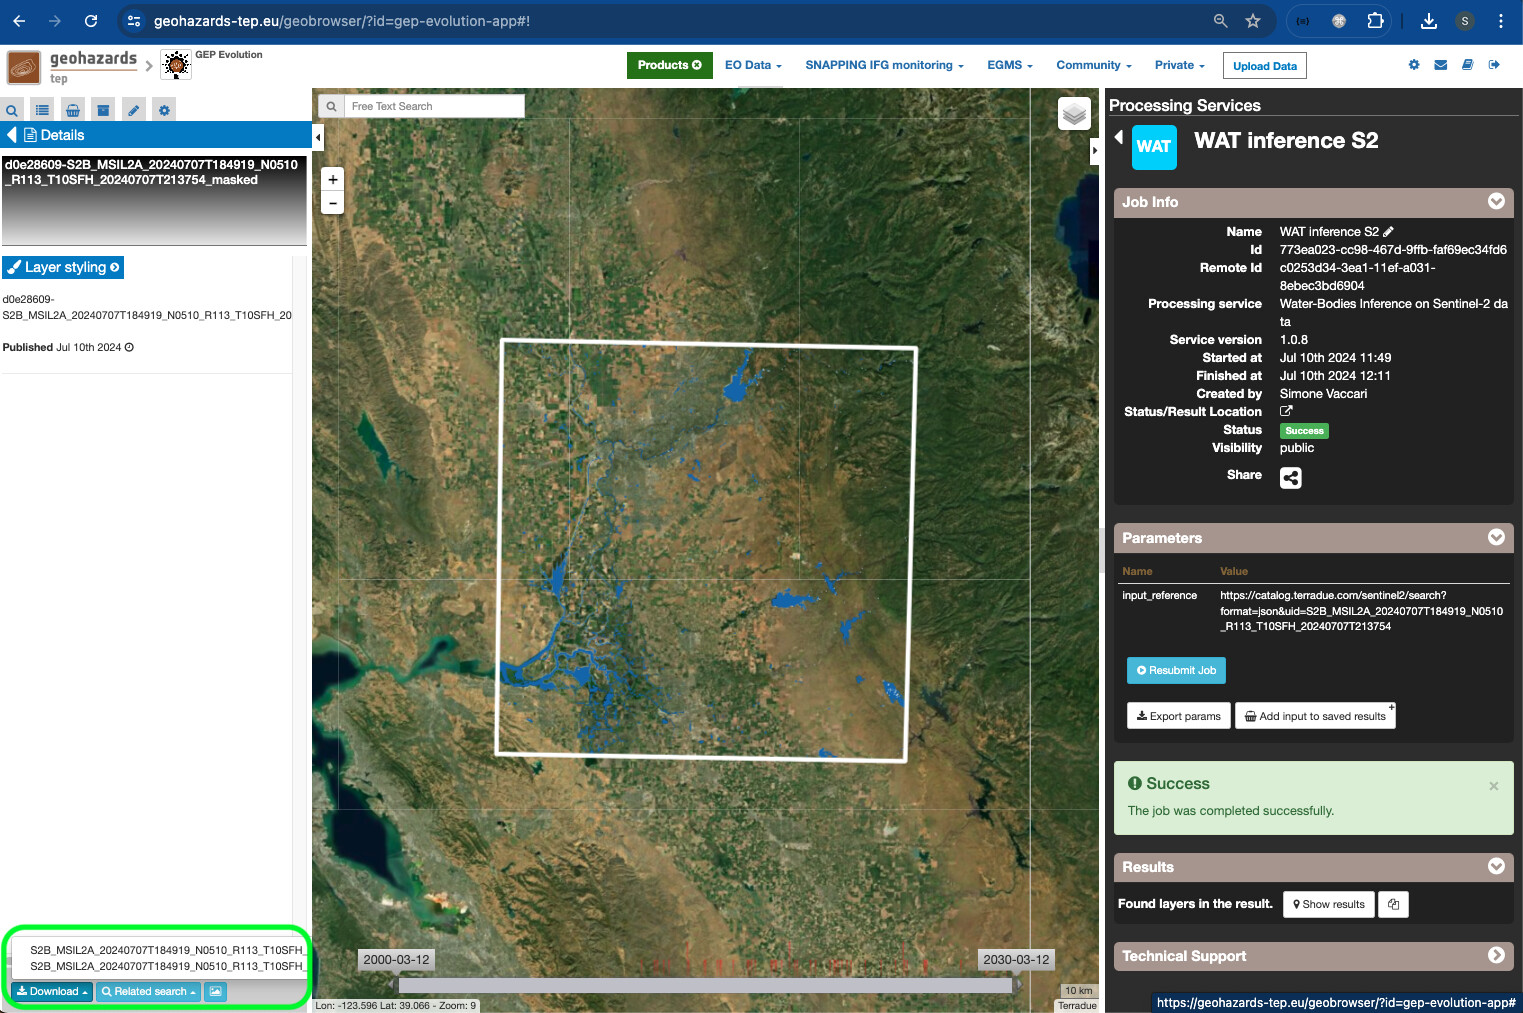
- When the job finishes, the user can click on the job and the Job info is displayed. If the Status is
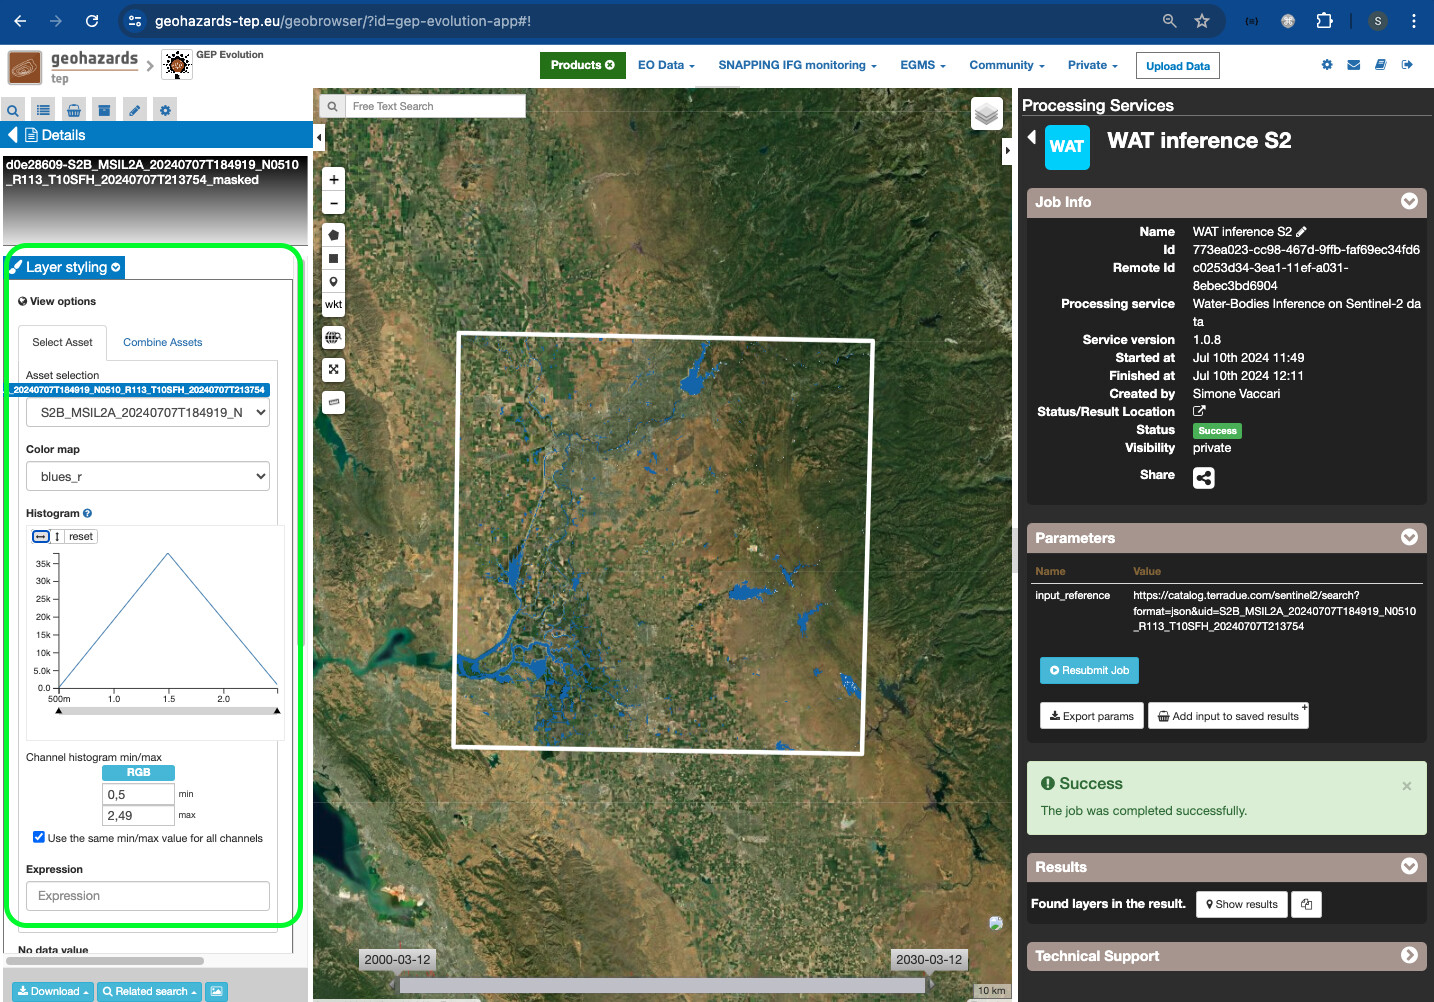
Success, theShow Resultsbutton appears on the bottom of the panel, and the results are displayed on theResultssection on the left side of the dashboard and on the map.
- The layer symbology and visualisation can be fully customised by double-clicking on the result product and on the
Layer Stylingdrop-down, where the user can select the asset to display, the colour map, change the histogram and other customisable visualisation options.
- The user can eventually download the individual assets of the result products by simply clicking on the
Downloadbutton on the lower-bottom part of the screen).
Conclusion
This work demonstrates the new functionalities brought by the AI/ML Enhancement Project to guide a stakeholder/user on using STAC for discovering ML models, developed by an ML practitioner, and for interacting with a Platform Operator for deploying such ML model on an Exploitation Platform, after which the stakeholder can execute the service with his/her own data. The following steps were covered in this article:
- Search ML model with STAC by defining key metadata and ML-specific parameters
- Configure an Exploitation Platform and deploy the discovered ML model as a processing service (supported by the Platform Operator)
- Launch a new job and monitor its execution
- Check job status and retrieve results.
Useful links:
- The link to the Notebook for User Scenario 10 is: https://github.com/ai-extensions/notebooks/blob/main/scenario-10/s10-search_executeMLmodel.ipynb
Note: access to this Notebook must be granted - please send an email to support@terradue.com with subject “Request Access to s10-search_executeMLmodel.ipynb” and body “Please provide access to Notebook for AI Extensions User Scenario 10” - The user manual of the AI/ML Enhancement Project Platform is available at AI-Extensions Application Hub - User Manual
- Project Update “AI/ML Enhancement Project - Progress Update”
- User Scenario 1 “Exploratory Data Analysis”
- User Scenario 2 “Labelling EO Data”
- User Scenario 3 “Describing labelled EO data”
- User Scenario 4 “Discovering labelled EO data with STAC”
- User Scenario 5 “Developing a new ML model and tracking with MLflow”
- User Scenario 6 “Training and Inference on a remote machine”
- User Scenario 7 “Describing a trained ML model”
- User Scenario 8 “Reusing an existing pre-trained model”
- User Scenario 9 “Creating a training dataset”